This is how to host a Namecheap domain on your Vultr server. This is for a domain that is registered on Namecheap, and you want to host the site on Vultr.
Pointing your domain requires two steps:
- Get the IP address of your Vultr server.
- Create 2 DNS records.
Step 1 – Get The IP Address of Your Vultr Server
If you followed this tutorial from the beginning, you should have already noted down your server’s IP address.
Otherwise, do this:
- In your Vultr account, click Products on the left side to go to the Products page.
- Click the name of your server to go to that server’s information page. You’ll see the IP address on that page.
- Copy the IP Address (not IPv6 Address).
Step 2 – Create 2 DNS Records
This is how to point your domain from Namecheap to your Vultr server.
-
Log in to your Namecheap account, then click “Domain List.” Then, on the row for the domain that you want to point to Vultr, click Manage. See the following image for an example.
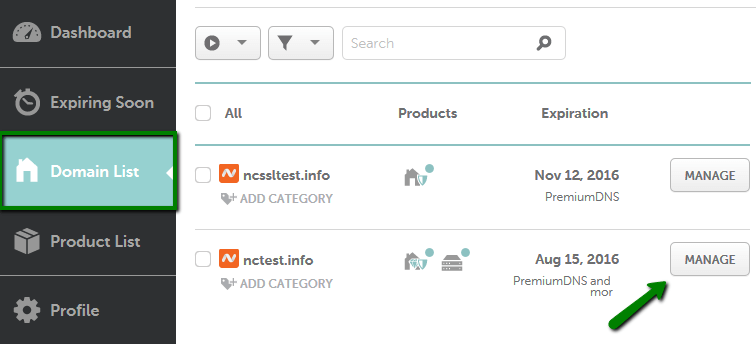
Click Manage next to the domain
-
Look down at the “NAMESERVERS” setting. Make sure it is set to Namecheap BasicDNS. If it’s not, then click the drop-down arrow, select Namecheap BasicDNS and click the green arrow to save your changes.
-
Click Advanced DNS at the top. See the image for an example:
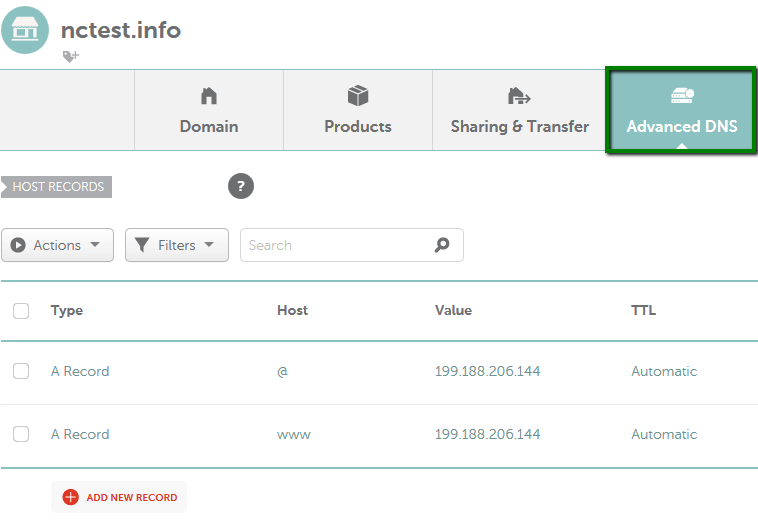
Click Advanced DNS on the top right
-
Find the HOST RECORDS section, click on the ADD NEW RECORD button and select “A Record.”
See the image for an example:
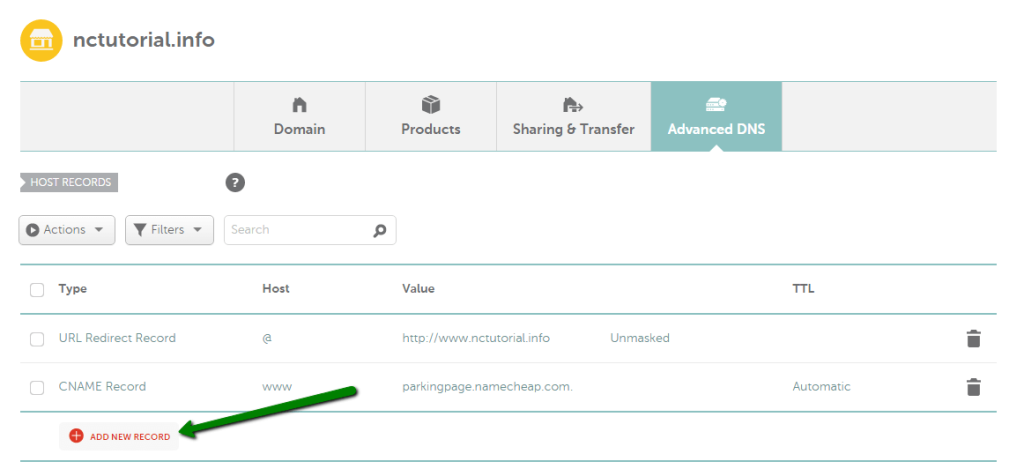
click ADD NEW RECORD on the lower left
-
In the Host column, type the
@symbol. In the Value column, paste the IP address of your Vultr server. For the TTL column, you can leave it as Automatic. Click the green arrow to save this record. -
In the same HOST RECORDS section, click on the ADD NEW RECORD button and select “CNAME Record.” Enter
wwwfor the Host. In the Value column, enter your domain name (without anyhttpprefix). For examplemysite.com. Leave the TTL column as Automatic. Click the green arrow to save this record. -
While you are still on the Advanced DNS page, delete any other “URL Redirect Records” and the default “CNAME Record” that has
parkingpage.namecheap.comin the Value column. You can delete these records by clicking the trash icon next to each one.The only 2 records remaining should be the ones that you just created.
See the following image for the records that you must delete. The records that you must delete are within the red box.
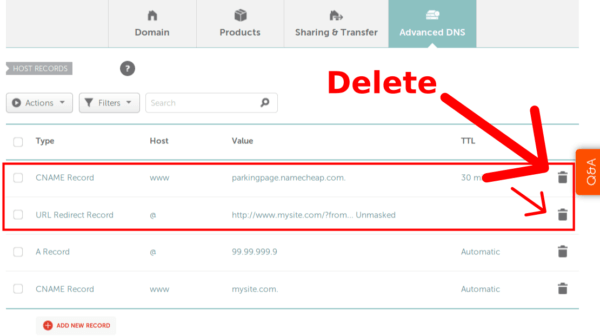
click the Trash icon on the right to delete a record
You are finished pointing your Namecheap domain to your Vultr server. Once you add the records, there is a waiting period before the effect takes place. It can be as little as a few minutes, a few hours, or even a day or two (but this long is rare).
Questions and Comments are Welcome