 This page is part of the Beginner’s Tutorial: Learn How To Setup, Manage Your Own VPS/Cloud Server With Multiple WordPress Sites – For Beginners.
To be able to host multiple WordPress sites on your own VPS server, you need to deploy (or create) a server instance. This page shows you how to deploy a server on Vultr.
If you’d like to complete this tutorial without paying for a server, use my Vultr link for $300 Vultr credit. I may (or may not) get a commission if you make a purchase, but you’ll receive $300 credit to test out Vultr and test your server skills. If you prefer not to use my coupon, you can still follow this tutorial with their cheapest server, and it’ll cost you only a few cents, less than a dollar if you complete the whole tutorial within a few days, and then destroy the server within a few days.
If you prefer not to use my coupon, you can still follow this tutorial with their cheapest server, and it’ll cost you only a few cents, less than a dollar if you complete the whole tutorial in one day, and then destroy the server within a couple days.
Pre-steps
Before you get a server on Vultr, you need to set up an SSH key in your Vultr account. An SSH key is like a password, it’s the way you’ll be able to authenticate yourself to your server. To set up your SSH key on Vultr, follow these steps:
-
Create your SSH keys if you don’t already have them on your computer.
-
If you don’t already have a vultr.com account, register one by clicking on “Sign up”. Otherwise, log into your Vultr Account.
-
Add your public SSH key to your Vultr account by following these instructions.
Get a Server on Vultr
-
In the top right corner, click the Deploy+ button, then click Deploy New Server.
-
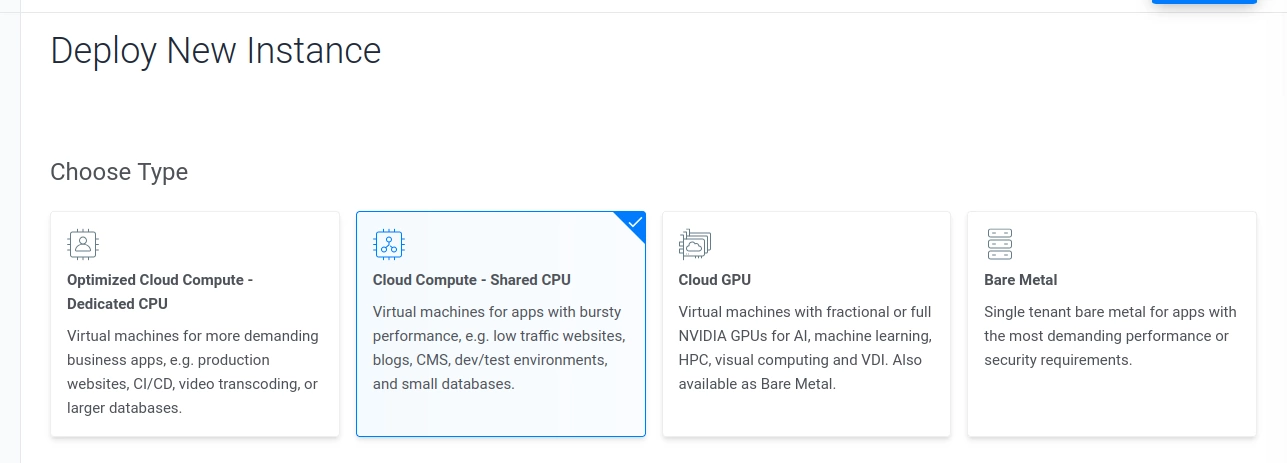
On the “Deploy New Instance” page, you’ll create a server. Create a server with these suggested settings so that you can follow this tutorial:
-
Choose Type: Select “Cloud Compute – Shared CPU.” Here’s an image:
-
Choose Location: select the location closest to where most of your site’s visitors will come from.
-
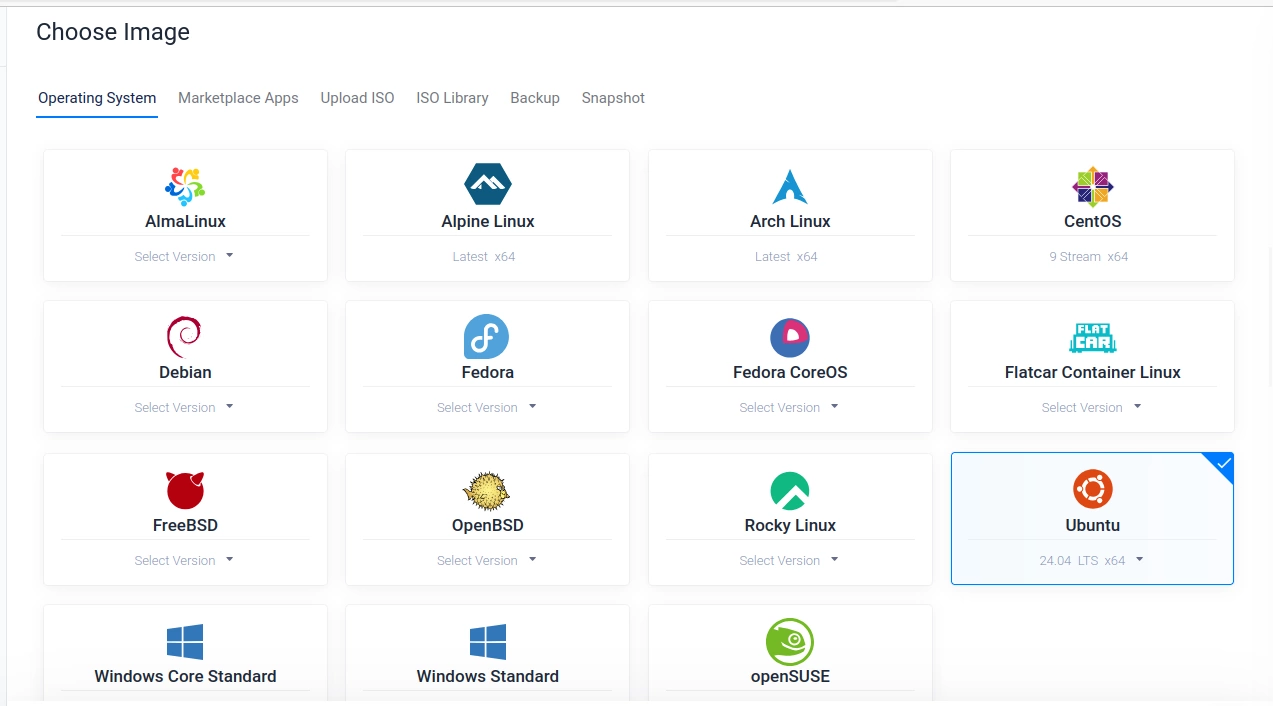
Choose Image: Select “Ubuntu“, then select version “24.04 x64“. Here’s an image:
-
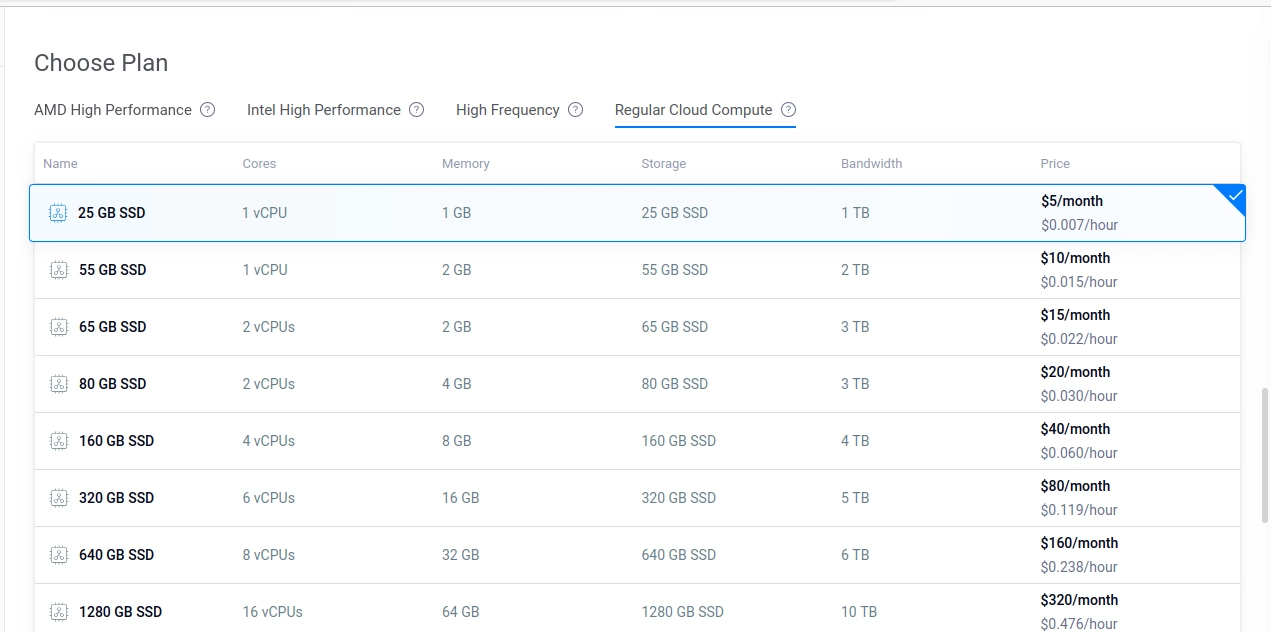
Choose Plan:
-
To follow this tutorial, all you need is the cheapest option: Select “Regular Cloud Compute“, then the first option, which is the cheapest. Here’s an image:
-
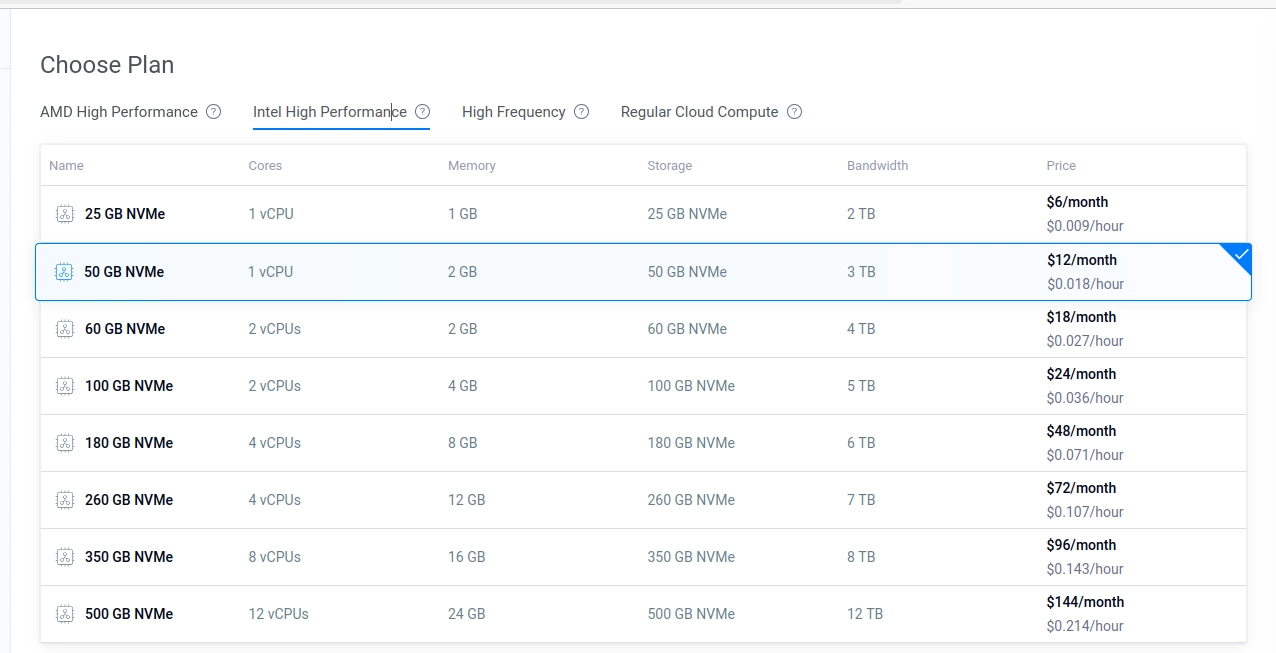
When you’re ready to put up live sites, choose instead the following options:
-
Select “Intel High Performance”, then select the option with at least 1 vCPU and 2GB Memory. That should usually be the second option. This is the minimum you want for a live site, and this can host many low to medium traffic sites. Or even several high-traffic sites, once we set them up with good caching. Here’s an image:
-
If you plan to host on this server more than 15 or 20 sites, select the option with 2 vCPUs and 4GB Memory.
-
To be future proof, you can go as high as you want, but you probably don’t need more than 8GB Memory for most WordPress sites that you would be making for small business clients.
-
-
-
Additional Features: Auto Backups You can remove Auto Backups because we’ll be setting up automatic backups in this tutorial so you don’t have to pay extra for that. If you prefer to keep Auto Backups, you can leave it on, as it’s worth it. But I’ve never tested Vultr’s backup service, I don’t know where they keep the backups. Instead, my tutorial will walk you through setting up regular automatic backups, but you’ll have to remember to download them once a month or so, whereas maybe Vultr makes the downloading easier, maybe they email them to you, I don’t know.
-
Server Settings: This is where you select your SSH key, the one which you should have set up in your Vultr account in the Pre-steps at the top of this page.
-
Server Hostname & Label: give your server a name that will let you recognize it in case you later have multiple servers. For this tutorial, give your server the name “tester“. The Label will be automatically populated as the same as your hostname, and you can leave it as is. Here’s an image:

-
-
Click “Deploy Now” to create the server.
-
The Status will say “Installing” for a short while. That’s okay. Click the name of your server to go to the server’s information page. On the server’s information page, you’ll probably see a notice saying that your server is still installing, and that’s okay.
-
You need to copy IP Address (not IPv6 Address) from this server’s information on the page. We’ll be using that IP address several times in the coming pages of this tutorial.
Coming Up Next
In the next tutorial, you will log in to your server for the first time and harden (secure) the server.
Questions and Comments are Welcome